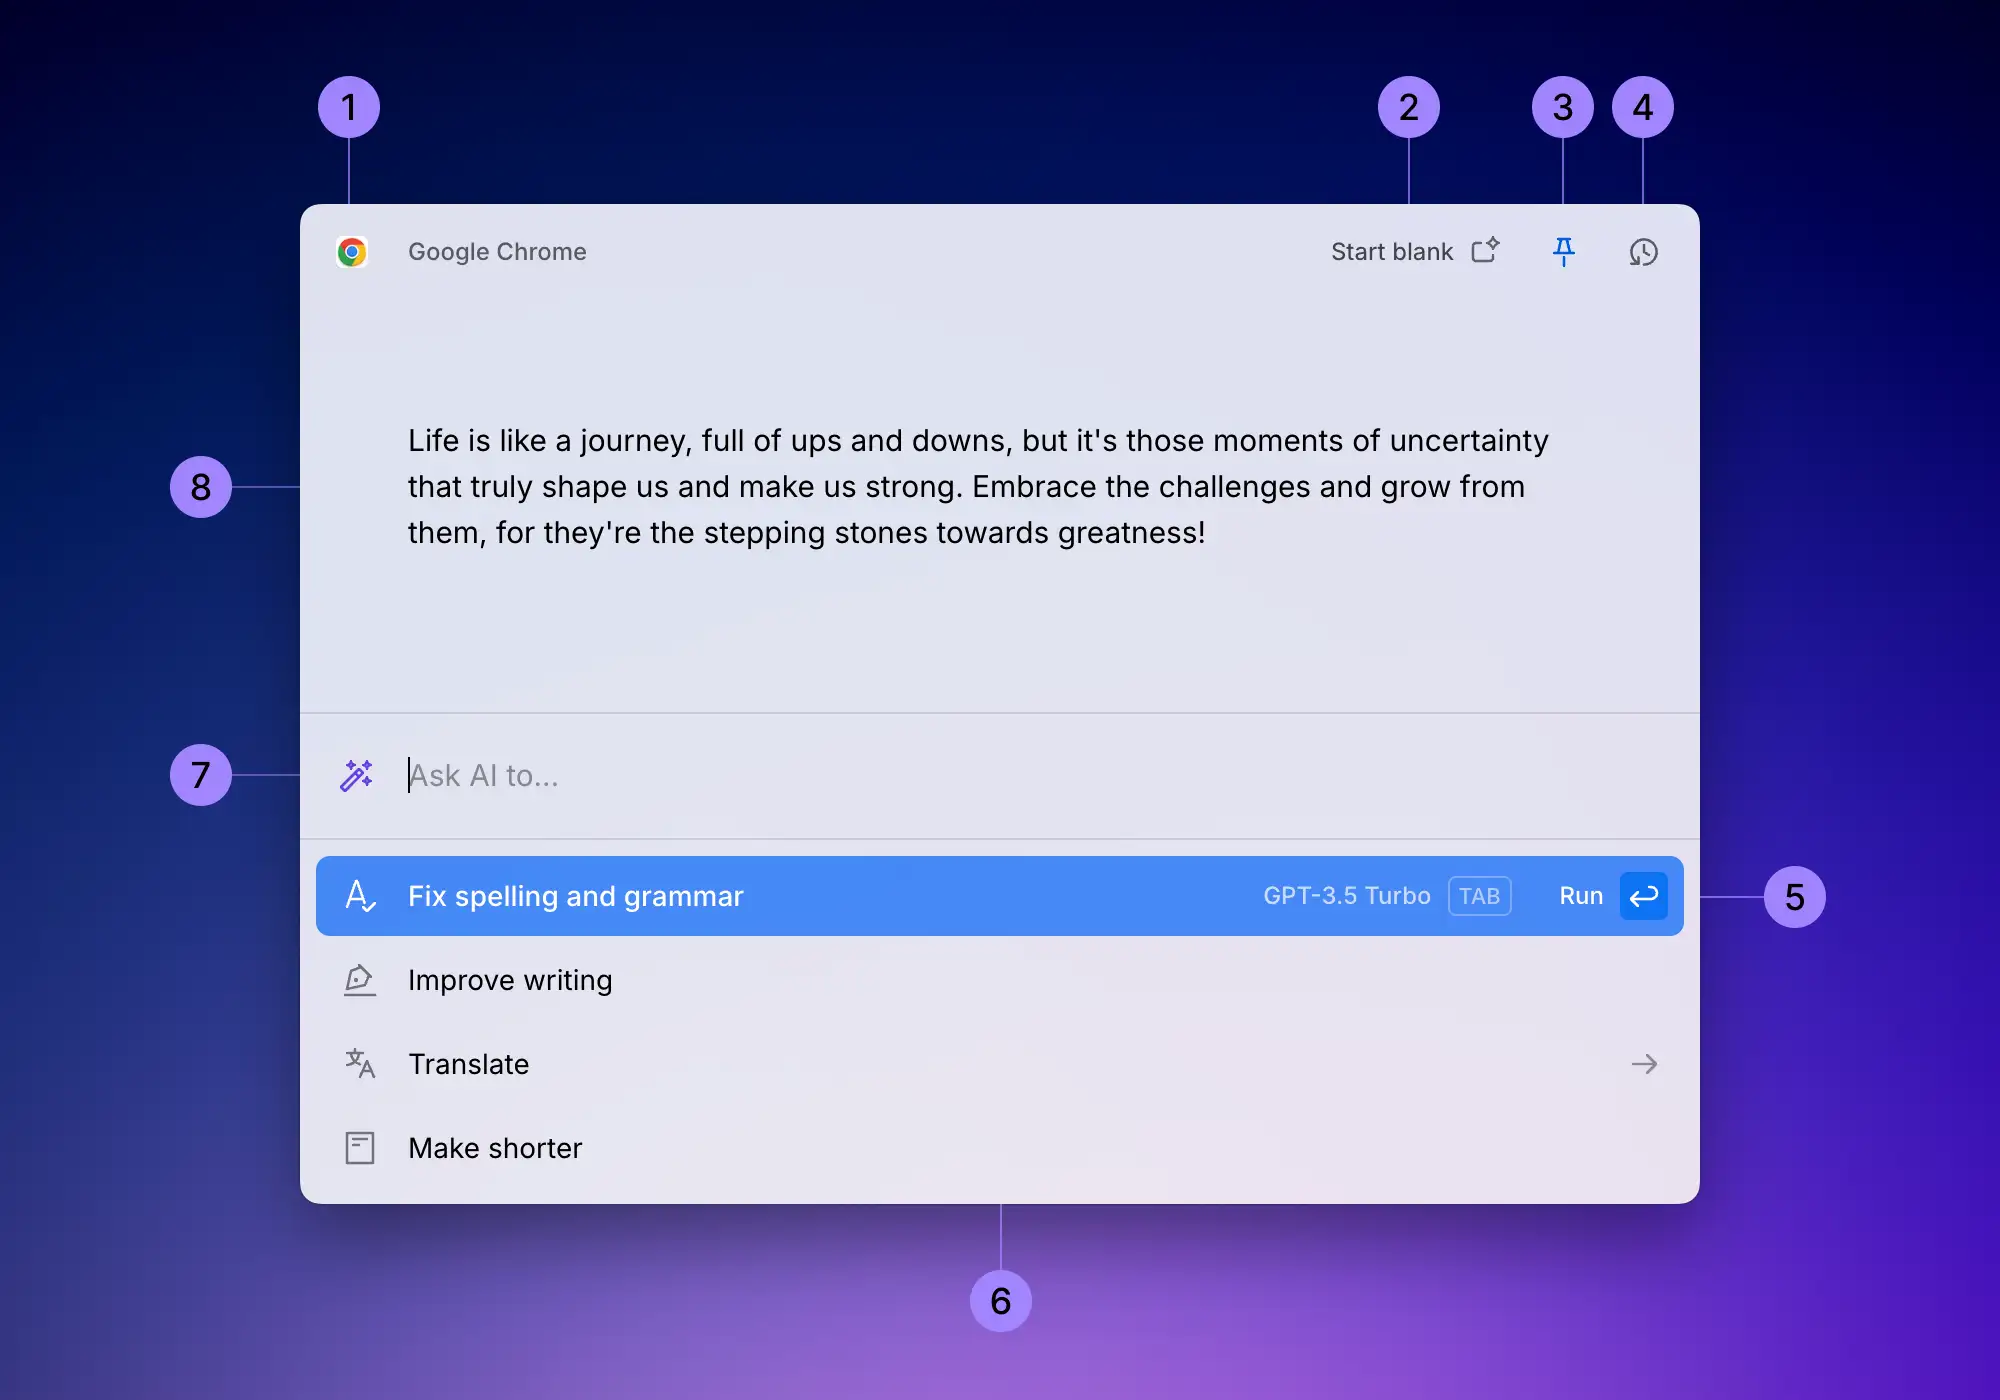
Interface overview
Familiarize yourself with the Kerlig app interface to unlock its full potential. Learn to navigate it using your mouse/trackpad or keyboard for the fastest interaction.

-
Source app
This is the app from which Kerlig was launched, it is used as a context when starting a chat or running an action, and later on you can insert the generated text back to this app.
-
Start blank or Start with content
Toggle between starting a chat or running an action with initial context – the text selected from other apps or from the clipboard, or starting blank – without any initial context. Starting blank is best for asking random/arbitrary questions that aren't tied to other apps.
-
Pin or unpin window (toggle)
By default, the Kerlig app window closes when you click outside of it. However, you can pin the window to change this behavior, which is super useful for back-and-forth chats and for interacting with other apps while keeping Kerlig open. You can always close the window by pressing the
Esckey or selecting "Close Kerlig" from the menu bar. -
Chat history
Your recent chats are easily accessible from the Chat History menu. You can also quickly restore the last chat by pressing
⌘+Ror start a new chat with⌘+N. -
Selected action
You can run the selected action either by pressing
Enteron the keyboard, double-clicking on it, or single-clicking on the↵icon on the far right. Additionally, you can change an AI model which will run this action either by pressingTabor clicking on the Tab label. If the action is “Run,” you can also choose a Preset. -
List of actions
Use the keyboard arrow keys
↑↓or click to navigate the list. -
Prompt (also a search bar)
Once you begin typing, it will search through the action list. After entering at least three letters, you will see the "Run" action, allowing you to simply ask the AI model for the prompt you have typed.
© 2025 Kerlig™. All rights reserved.